Sunday, March 29, 2020
Foley
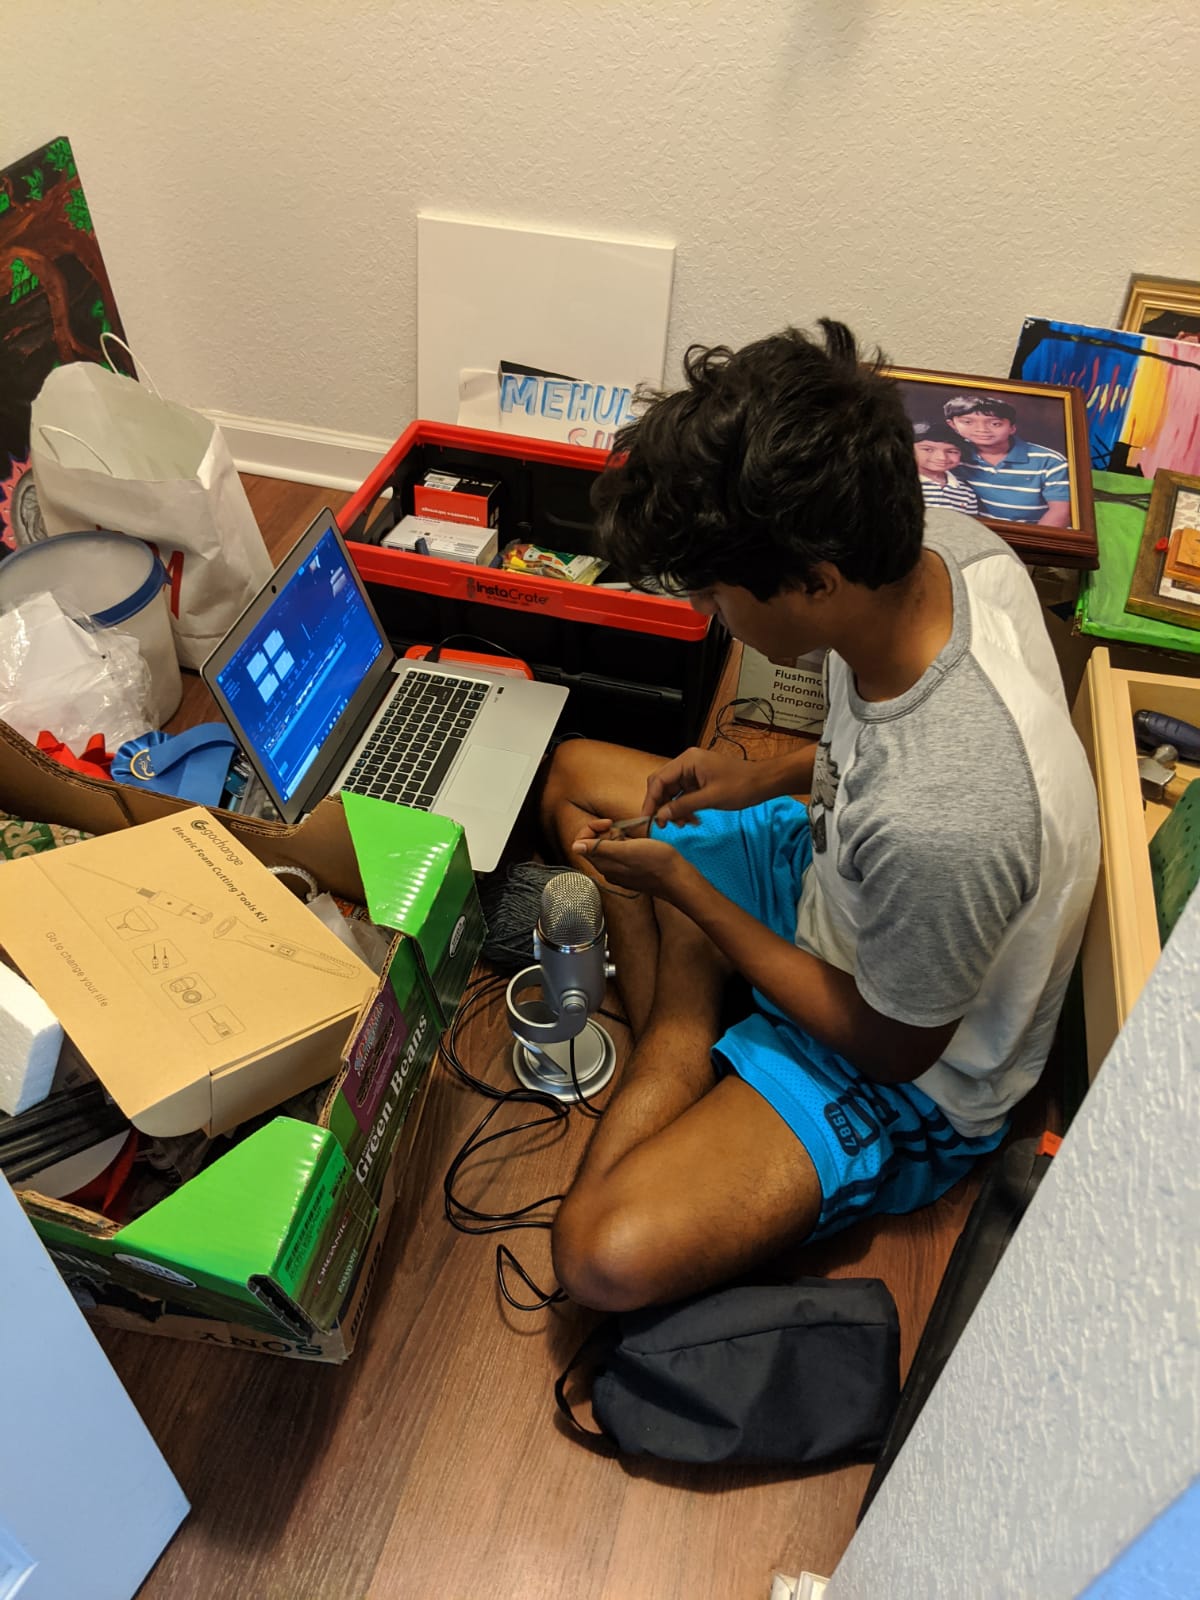
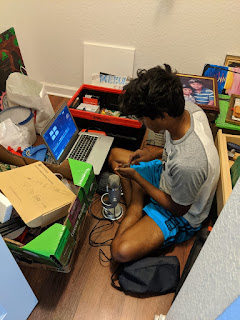
Hello there! Most of you are probably asleep by now but I've accomplished a lot in editing this past week. I've exported edited footage over and over again until finally I have a project open with the right cuts and transitions, but still a little work on the audio needed as well as cutting the opening down to 2 minutes. Outside of the actual editing work on software, I've focused more on foley and audio this week. I had to manually add the audio of Ricardo knitting, footsteps and the tossing and opening of the bag in one of the scenes. Aside from that, there were a lot of adjustments that had to be made to the background noise so that the dialogue could be more clear. I ended up driving back to the location to record 10 minutes of the ambient noise there so I could add it back to the footage. Here's a lovely picture of some foley to leave you guys snoozing.
Friday, March 27, 2020
Editing Software
Good afternoon. Let's get straight to it. I've received a lot of questions about editing software so I decided I'd do a little post to guide you guys on where to start. Obviously I'm not an expert, but these recommendations will definitely be useful regardless of your skill level. And of course, these are my personal preferences so no need to throw away your love over software that you despise :) (Also these are listed in no particular order and all the mentioned software includes a free version)
1. Windows Movie Maker
Now many of you are probably wondering why this is even on the list, but for very simple editing this does the job. You can do simple cuts, splits and trimming and even add voiceover. I used this software to edit my stop motion film a few years back and although it is a simple editor, it can produce quality results. Also this editor is no longer supported by Microsoft so you may have to download it off a 3rd party website. So make sure you get it off a reputable site to prevent against viruses or malware.
2. Filmora
Filmora is a more advanced video editor which offers a lot of presets for titles, filters, and transitions. Personally, this is what I've been using for my cutting, trimming, etc. because of the convenient keyboard shortcuts it offers. It's a good step up from windows movie maker but requires a payment to remove the watermark during export.
3. Davinci Resolve
Ideally, I'd be using this software a lot: it has a free version which has more than enough features to care about upgrading, offers color and vector scopes for color grading, and used my many blockbuster productions. However, given the capabilities of this software, it requires higher specs to run smoothly. So due to the constant lag I get from running it on my computer, I've only been using it for color grading.
4. Kdenlive
Kdenlive is an open source editor which offers versions for both Linux and Windows. Its installation process is slightly unusual compared to the other editors listed above but it offers many features as the softwares mentioned above. In the past I've used this software mainly for its chroma-key feature (green screen) since Filmora doesn't offer it and Davinci Resolve lags too much on my computer for it to be a practical option. Kdenlive is relatively lightweight in terms of specs but for some reason it crashed a lot on my computer, perhaps since its opensource which usually means a lot of bugs. But it's been a few years since I've used this software and there have been many updates and bug fixes so chances are you'll find this software to your tasting.
Tuesday, March 24, 2020
Footage
Good afternoon guys, hope you all are staying safe and sound from this intensifying pandemic known as the CORONAVIRUS! Today was quite interesting. For those of you who need a little background, we finished shooting last week and now I've entered the editing process which has been a bit frustrating to be honest. The main issue was the footage itself because we used three cameras: Deven's Canon 60D (I think?), My Canon Rebel T3i, and the camera on Saurav's DJI Mavic Pro 2. What does this mean? Three storage devices (e.g. SD cards). After the shoot I set up a google drive account dedicated to the film so that I could better organize all the clips. I had folders set up for each person and I gave the account details in the groupchat so that everyone could access the drive account to upload their videos. Unfortunately, Saurav's footage was in 4k quality and since everyone's now working from home and using up the internet bandwith, he was unable to upload the videos. Same issue with Deven.
Now what do we do when the internet fails to meet our needs? We go old school. Last evening, my brother asked me whether I wanted to go biking. And luckily, I already knew of this footage issue prior to him asking. As the sun neared the horizon, we set off towards Deven's house, on a dangerous journey to obtain the videos. In the sack fastened across my shoulder, was a small USB stick inside the zippered pouch. We zoomed through sidewalk, grass, water, blood, and tears until we finally reached our destination and . . . Voila! We reached Deven's crib! In about 20 minutes he was done copying the data from his SD card onto my USB and we biked back home and called it a day.
Today was quite similar except I used a vehicle to reach Saurav's house. He gave me the microSD in an envelope (coronavirus precautions) and we recorded his voiceover inside the car with the mic so that his voice would be more clear. And that's all for today folks! Time to work on editing!!
 |
| Saurav's drone footage |
Sunday, March 22, 2020
The script part 2
So I realized that I didn't actually attach the script in my last post . . . oops. SO here's our script!
https://drive.google.com/open?id=1Syu3ovyKnVWxZD1TL52LG70MTPsuyhfO
With that out of the way, time for a little reflection! First off, yes we did run into problems. Saurav Dalvi, our drone operator had an eye appointment earlier in the day that we filmed. And they dilated his eyes so that was definitely an issue. But he impressed me when he still said he's coming to the shoot because it's hard to find someone with that much dedication these days, especially when they're not getting paid for it. We ended up having Gian do one of the drone shots manually from outside the car while Saurav drove the vehicle . . . wait . . . Nevermind! Saurav's eyes were NOT dilated! April fools! He was in perfect condition to drive the vehicle :) Moving on!
(Above: some behind the scenes footage)
Other problems and tips and tricks
Halfway through the shoot, we realized we had to pace things up. Since I chose to film during "golden hour" or shortly before sunset, we were quite short on time. I had to skip the shot with Ricardo in the car temporarily because I knew that would be easy to fix in post or to reshoot in case we ran out of light. Initially, I was planning on shooting the conversation scene twice: one for each set of characters. And then I would finish off with a final sweep of close-ups, long shots, and inserts of both characters. Unfortunately, because of the time constraints, we didn't have the ability to go through the scene three times. So instead, I set up Deven's camera to point towards him and Saurav while my camera was set towards Ricardo and Gian. This way we were able to obtain footage of both angles during one take. And we ended up losing the bag Gian throws so we couldn't take a close-up shot of that. But besides all of the problems above, the shoot went pretty smoothly, and Deven got to lie down in the trunk while the car was moving so we could get that awesome tracking shot of Ben skateboarding. I still have a lot of work left on the opening but until next time, Ciao!
Wednesday, March 18, 2020
The script!
Good night y'all!!! So today's actually been a very exciting day. I rounded up a team to shoot the opening and we filmed it today. I settled on this unused road just off of US 27 for the location as you can see below.
Most of the crew wasn't really familiar with the rest of them so while initially there was some hesitation in communication between them, but they broke the ice when they got to explore each other's tasks and began appreciating the diverse strengths and abilities each of them had. Now I know you're just begging to meet the crew so here they are.
And of course the guy in the blue shirt is . . . me!
Now quite frankly, I'm tired after today's long shoot. So I'll be back soon with the details on how it went. Signing off!
 |
| Recreation road branches off of 27 to the left |
 |
| Ricardo Martiarena - our main actor |
 |
| Deven Mistry - cameraman |
 |
| Saurav Dalvi - drone operator (drone not pictured) |
 |
| Ben Ruddy - friendly neighborhood skateboarder |
 |
| Gian Luca (right) - our vehicle operator (and assistant drone operator since Saurav was partially blind from his dilation) |
 |
| Me - The Director |
Tuesday, March 17, 2020
Storyboard
So . . . I redid the storyboard! Now I know what you're thinking, why didn't I start off with my usual good morning/good evening? Honestly, there isn't any reason at all. Good evening! And here is my storyboard. Enjoy!


You'll notice that the first part is missing. That's the piano scene. I already filmed it this morning before I finished the storyboard!
Sunday, March 15, 2020
Synopsis
So today we're going to go over the entire storyline because an opening without an understanding of what you're opening to isn't a really good opening. I haven't finalized on names yet so we'll just use the names of actors for now. First of all, I think I'll go with the first option from the previous post about Garrido's entry. He's an aging cartel don and he's starting to lose interest in the type of business his cartel runs. He starts to realize the simple joys of life bring much more happiness than the acute thrills of constantly escaping the cops and shootouts with rival gangs. His subordinates start to notice this difference in him but ultimately understand that Garrido still holds much power so they fear to dissent against him.
Now, enter Ben Ruddy. He's a teenage skateboarder trying to live in the nostalgic era. He carries his music on an IC recorder and listens to his music through headphones. He's skateboarding peacefully when he runs into Garrido's cartel having a tense negotiation with some amateur local peddlers. Now we start to question who Ruddy actually is because he's starting to set up equipment that a typical skateboarder doesn't just carry around. And he's sneaking up on the men, careful not to blow his cover, and recording their conversation. But then he gets caught by someone who was out back taking a piss and returning to the area of negotiations.
Later Ben is brought before Garrido so the cartel can decide what to do with him. But given Garrido's declining interest in the business, Garrido's actions start to confuse his workers when he actually decides to take Ben in to join him as part of his gang. The two start hanging out with each other more and more and the gang members start to become more and more annoyed. Issues definitely persist between them and some members start to notice Ben's actions and his sly surveillance of their entire operations, but those who gain too much knowledge strangely disappear soon (Ben takes them out). F
Now there are some minor plot points in between . . . but here's the final twist: BEN WORKS FOR GARRIDO. Garrido hired him to take out some of the black sheep in his cartel because he started noticing that more and more of his product was either lost in transportation or never reported to him after delivery. But you thought that was it?? Yeah that's it. The two have a final scene together where they both sweep up the gang of all the black sheep and spies together!
Saturday, March 14, 2020
Stuffed Mushrooms!
Good evening my hungry caballeros! If you're looking for some tasty food, look no further because here I present to you . . .
Stuffed Mushrooms |
| stuffed mushrooms . . . made by me! (yes I know they're not stuffed, this was before I added the stuffing and baked them. And I was too hungry about taking a picture afterward) |
Updates
Recently I've been brainstorming some new ideas for my film. I'm definitely going to have to redo the storyboard before filming this week and I'm planning on decreasing the number of actors so the production is easier to manage. I still haven't gotten an angry message from my ex or her dad about returning his tripod and mic so, in terms of equipment, we haven't run into many issues :) As of right now this is what I have in mind for the intro. A nice dinner scene with Juan Garrido (my actor) eating something. Or maybe he's waking up after a "fun" night with a prostitute who's snoring on top of him. I actually like the second idea much better but I have a feeling it's going to be a bit difficult finding a prostitute or someone willing to lay on top of a guy knowing that's what her role is. And I'm sure there'll be some criticism mishandling the representation of woman but I have a good feeling its going to be a lot easier to find a woman willing to lay on top of him rather than under and get crushed by Garrido's muscular body. Fast forward a bit and we find him face to face with Ben Ruddy (my other actor). Why is he here? Find out in the full synopsis next time! Goodnight y'all.
Thursday, March 12, 2020
Color Grading
Good morning my creative pupils! Today we're going to enrich you all with some tips on . . . COLOR GRADING.
What is color grading?
Color grading is the process of adjusting the tones and colors of film to create a certain mood and atmosphere for your production. Nearly every professional film utilizes color grading to control the levels of highlights, shadows, and other features and especially since it has become so affordable and accessible recently with software like Davinci Resolve and Adobe Premiere.
The Process
First off, you want to check the technology with which you're shooting. If you're like me, you're using a DSLR (a Canon Rebel T3i in my situation). Typically these cameras are already programmed for the beginner user, a middle-aged, middle-income Indian father who wants to show off his big camera to his friends, regardless of the lacking experience he has with cameras. So the camera is already preset to have a higher sharpness and contrast to produce ready to go videos without necessary color correction or color grading. Unfortunately, if you're trying to produce a more professional film, these presets sacrifice the detail in the footage to create sharper film. Instead, what we're going to need to do is to select a neutral or flat preset. Or if you're feeling a bit more extreme, shoot in RAW. The result is shots which do a better job of preserving the original detail, but absolutely require color grading and color correction unless you want extremely washed-out footage.
 |
| Before and after color grading (The Martian 2015) |
Color Grading
Now the actual process of color grading is an extensive process that is often the responsibility of entire studios for blockbuster productions and is a crucial step that should not be overlooked. The actual process can take hours depending on the level of detail in establishing a certain mood that the filmmaker wants. So we'll just go over the overall process briefly. In short, there are a few elements you want to consider.
1. The highlights and shadows - typically many mainstream productions go for the orange and blue color scape with shadows carrying a blue tint and highlights carrying an orange tint
2. The contrast, LUTS, and RGB levels - In post-production, a variety of tools are used to correct the footage and bring back the color lost while shooting with a neutral camera preset. LUTS allow for a film to carry a consistent look throughout its entirety and often use algorithms to automatically adjust levels. The contrast is often something that is changed in post-production as well since shooting in neutral means the footage has almost no contrast. RGB levels allow for better management of skin tones and can help bring warmth or coolness to your film.
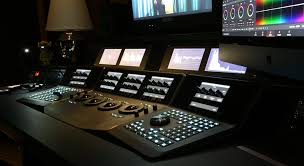
3. Vectorscopes and Colorscopes - Unless you have an extremely large budget, chances are you're not going to be focusing your budget on post-production software. So unless you're already a professional PC gamer, your monitor (if you even have one separate from your laptop) is likely not to have a great color range. This means the footage you see on the monitor is likely to be altered slightly and may appear different if you plan on presenting your film on a different device and especially a theater. Colorscopes and vectorscopes provided by software like Davinci Resolve provide graphs and analytics for you to understand the color range of your footage graphically rather than subjectively through superficial visual analysis. Learning how to use these color scopes can give you much more control with how your film actually turns out and a more accurate interpretation of the color range.
 |
| Color and vector scopes in Davinci Resolve |
Wednesday, March 11, 2020
Confusion
So it's been a really rough week. Or actually more like a rough two weeks. I don't really want to get into details but I have to give back the tripod and mic. And I don't know how or when or whether I should return them right now or after the film. I think you guys can figure the rest from that. Oh! I almost forgot! Good evening to all my beautiful and handsome readers! How could I forget to greet you all, how bloody foolish of me, good jolly tea.
I did do some research on ND filters the past week. In the video below you'll see that the video of the car is slightly overexposed, or rather was overexposed until I increased my f-stop, sacrificing a shallow depth-of-field for a correctly exposed shot. However, if I wanted to maintain that same DOF, I could purchase an ND filter that clips on to the lens of the camera and acts as sunglasses for it. It reduces the glare of the sunlight and makes outdoor shooting much more easier.
Progress
Not much. I'll be perfectly honest I've been in emotional turmoil the last two weeks but you know what I made the most of it! There may not be much tangible progress, but I have a much better idea of how my project is going to pan out. And through some reflection, I came across a few realizations. One is that I'll most definitely have to change the location. The leading lines that I described when going location scouting definitely would have added a nice touch to the film but I've found a different location right next to me. And considering the limited time on hand, a smaller distance from home means more time and money saved. And it would be much easier to gather the actors. Another realization I made is that I want to incorporate a lot more closeups in my opening and allow for narration by the golden voice in our class, Juan Garrido. So that means I have to redo my storyboard and my script. As of right now, the little spark essential for my motivation is a bit numb, especially amidst the depressing news coverage of the coronavirus, but I have confidence that helping Andres and Alfredo on their films will bring back that inspiration for me.
 |
| An ND filter |
Sunday, March 8, 2020
The great film opening . . .
To me, a great film opening doesn't spoonfeed information to the audience. It slowly draws them in generating a sense of pull through character development, vibrant mise en scene, fluid camera technique, or symbolic composition. Of the film openings shown last class, my favorite one was the one from Scream. While the opening does not use have an extreme artistic appeal to the frame composition and camera movement initially, it transforms the plot into one that viewers don't expect—from the casual hot girl popcorn flick to one where that same actor is at the height of her fears.

The intro scene that Scream presents does quite a few things well. One is the establishment of the characters on a screen through the repetitive phone call. Although the woman repeatedly tries to shake off the caller, she eventually gives in to him, showing that even the most stubborn could succumb to his charisma. The gradually diminished lighting also establishes the tone of the piece, allowing the viewers to register the transition from the film's jovial start to the tense scenario it soon brings. And of course, the film doesn't show the man calling leaving wonder in the audience as to who and what this man's intentions are.
The intro scene that Scream presents does quite a few things well. One is the establishment of the characters on a screen through the repetitive phone call. Although the woman repeatedly tries to shake off the caller, she eventually gives in to him, showing that even the most stubborn could succumb to his charisma. The gradually diminished lighting also establishes the tone of the piece, allowing the viewers to register the transition from the film's jovial start to the tense scenario it soon brings. And of course, the film doesn't show the man calling leaving wonder in the audience as to who and what this man's intentions are.
Friday, March 6, 2020
Story Tips
Good evening my beautiful wonderful readers! I hope you all have been taking your daily dosage of movies and tv. Today I'm going to be giving a bit of information on how to create stories for your film interests. (Also because I probably need to recreate my story after looking into the resources I actually have available)

I watched a Ted Talk recently where the screenplay writer for many films like Nemo and Wall E. One of the most important elements to a good story is to make sure you base it off of life experiences. And such stories do not need to exactly mirror life events. Many screenplay writers create the metaphorical connections to their life events when creating stories which is often much easier than creating an entirely new story. And even when creating a new story, most screenplay writers find their experiences having a profound influence on their stories.
Another important tip to live by is "don't give 4, give 2+2." This allows for better development of suspense and character while shrouding the premise just enough to sustain interest in the film by the viewer. This strategy is used in nearly every genre of film, proving an efficient technique to create interest.
With that being said, stay tuned for my story because these tips sure are going to apply :)
Wednesday, March 4, 2020
Group meetings
So today in class my peers and I assembled into groups to discuss the progress we've made throughout the past few weeks. My group had an especially diverse collection of filmmakers ranging from Alexa (a CBTV girl) to Juan Garrido, the man with the golden voice. We started off by having a brief discussion of where we stood in terms of progress and most people had a general idea of what their story was or had a storyboard already created.
Eventually, we got around to the presentations. We all had a personal laptop provided as a courtesy of the school and we pulled up Mrs. Stoklosa's website to access our blogs. We went around to discuss each of our individual sites and gave constructive feedback on how our peers could improve. When it came to me I wasn't exempt from the feedback. The main issues with my blog was the stop motion idea and storyboard. They did a really good job of roasting me for thinking about stop motion. Even my teacher advised me on how stop motion filming requires extensive planning which I should've began first semester. The other issue that they brought was the profound amount of frames required to produce a quality film opening production. The other point of concern was the story board. Many of my friends felt that my story had many issues or would produce trouble for viewers to understand the plot. So we discussed possible solution to resolve the conflicts presented within my story board.
Music was another topic which received a great deal attension amongst our group. Prior to the group discussion, I was honestly planning for obtaining free music rather than obtaining music rights. To me it felt almost impossible to obtain music rights. For example a producing giant like Universal Studio.
I feel that this experience allowed to widened my perspective on this film opening project and has allowed me to prevent common mistakes through the advice of peers.
Subscribe to:
Posts (Atom)
Intro
Welcome all, you can call me Mehul, and I'll be sharing with you documentations of my findings on the internet! Please know that none ...

-
So I realized that I didn't actually attach the script in my last post . . . oops. SO here's our script! https://drive.google.com/o...
-
https://youtu.be/98NHhIdpyR0
-
 Good evening my hungry caballeros! If you're looking for some tasty food, look no further because here I present to you . . . Stuffe...